
KH270B 지능형 비파괴 초음파 경도 시험기
- 설명
- 문의
설명
- KH270B 지능형 비파괴 초음파 경도 시험기
- OVERVIEW
KH270B intelligent nondestructive ultrasonic hardness tester is a measuring rod by means of ultrasonic sensors to measure the hardness of a high-tech, intelligent new tool. As the instrument uses an advanced sensor systems and microcontroller technology, so the instrument in the function and structure is completely different from the traditional ultrasonic hardness tester, especially in the realization of cloth, Luo, multi-dimensional standard hardness conversion, multi-point equilibrium value The calculation shows that the exact precision, the use of simple procedures and many other aspects have been further refined and improved.
이 장비는 주로 로크웰 경도 측정에 사용되며 해당 브리넬 경도로 변환할 수도 있습니다., 표시할 비커스 경도.
특징: 가공물 표면에 손상이 없음, 고속, 간단한 조작과 높은 정밀도. 완성된 작품, 금속판, 금속판 (질화 층을 포함하여, 침탄층, 도금층, 등.), 대형 부품의 이동이 용이하고 특수 형상의 부품 및 부품의 제거가 어렵습니다., 될 수 있다 100% 직접 경도 측정.
KH270B 지능형 비파괴 초음파 경도 시험기
- 인위적인 데이터
| 표시범위 | HRC10-70, HB100-550, HV100-999 |
| 디스플레이 정확도 | 로크웰 경도가 표시됩니다., 0.1°의 범위와 정밀도를 표시합니다. |
| 표시 정확도 | 로크웰 C 경도 ±1단위 |
| 압력 헤드 사양 | 136°다이아몬드 피라미드 |
| 접촉압력 | 균일한 접촉압12N±1N |
| 전원 공급 장치 | AC220V±10%, DC5V |
| 전체 치수 | 200x100x35mm |
| 무게 | 0.28킬로그램 |
- KH270B 지능형 비파괴 초음파 경도 시험기
- 기본 원칙
균일한 접촉 압력, the sensor bar to the top of the pressure head and the specimen surface contact, the hardness of specimens of different rods produced by the resistance of the sensor is different from feedback received ultrasound signal change. Ultrasonic hardness testing method is through receiving different ultrasonic sensors to measure the frequency change the hardness of the specimen surface.
Of course, the elastic modulus of specimens of different, there will be some impact, if the same standard modulus test block can be adjusted to eliminate this effect. - KH270B 지능형 비파괴 초음파 경도 시험기
- INSTRUMENT CALIBRATION AND USE
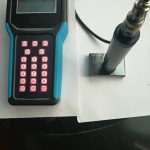
Instrument panel and function keys:ㅏ. ON
비. OFF
씨. Measuring headsocket
디. Charging connector
이자형. The number key
에프. Function key
G. Revised value of the key
시간. Measuring key
나. Setting key
제이. Undervoltage instructions
- 1Power Switch: Press the switch to “ON” power is on, the display shows “0”, 기기를 일반 측정 모드로 전환, 누르다 “OFF” 스위치 기계가 꺼져있어.
- 20-9 패널의 숫자 키는 “환경”, 사용된 다양한 값을 입력하세요..
- 3 이중 기능 키용 패널의 모든 기능 키, 언제 “설정” 교대 근무 시 모드, 선택한 것은, 세간의 이목을 끄는, 낮은 키, 높은 블록, 효과적인 낮은 블록 키, 선택한 것은 (즉, 디스플레이 선택) 네 가지 요소를 통한 전체 사이클의, 매번 “당연한 선택” 변환 내용을 표시하는 키. 1. 전자 □ □ □ (여기서 □ 프로젝트 가치) 고급 보정값 영역용, 높은 프로필이라고 불리는.
- P □ □ □ 저위 영역 보정값, 로우 프로파일이라고 불리는, 같은 것을 따라. H □ □ □ 공칭 값에 대한 높은 수준의 테스트 블록, L □ □ □ low test block for the nominal value. General factory, have set all the settings finished, without adjustment, when for some reason, need to re-set, you can follow these steps.
- 3. 1첫 번째, according to “조정하다” 단추, the display shows “0” state of the school the whole measure, then measure the actual value of the high block (value may be slightly increased with time changes, taking some value to the former) measured in a single block to obtain a set of data points, and then take one value and recorded in case the “세트” when a “high profile” value into the machine.
- 3. 2Blocks and then measuring the actual value of the low hardness, and high block as the value of measuring points and recorded one take to prepare for the “세트” when a “low key” values are stored in the machine.
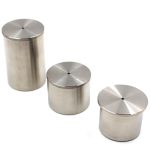
To obtain the “high profile” 그리고 “low key” and the nominal value of the hardness test block, a high degree of test block referred to as “높은 블록”, low test block referred to as “low blocks”, that made settings need to enter a complete set of data, 그만큼 “high profile”, “low key”, “높은 블록”, “low blocks” of four values
- 3 . 3 누르세요 “Settings” 단추, the display shows E □ □ □, that is the setting state, E said that a high degree of value, this time to be made in the above “high profile” value through the numeric keys to enter can be (note The display shows four figures, the low 3 significant). Enter the value is correct, 누르세요 “high profile” button to confirm, the display shows “0000” indicates data has been identified and read into the machine, and then press the “당연한 선택” key the display shows P □ □ □ into the “낮은” value set given state, then the value can be low-key with the numeric keys to enter (the same low three significant), is correct, 누르세요 “low profile” button on screen “000” to confirm and then press the “당연한 선택” key, which was entered H □ □ □ state of high block value set, then still using the number keys on the high hardness of the block with the number keys to enter the nominal value can be (low three significant), is correct, 누르세요 “높은 블록” button to confirm the obvious, “000” , then click “당연한 선택” 단추, the display was L □ □ □ blocks of low hardness value is set to enter the state, then press the number keys are still the low hardness of the nominal value of the input block can be, correct and press the “low block “button was” 000 “, thus, all completed a set of data set (according to what was selected key to cycle through the data stored is correct).
- 3. 4누르세요 “Measure” key was “0” into the normal measurement state. In the measurement process if there are errors, 그 다음에, generally less than 2 도, you do not have to adjust, if more than 2 도, 위의 방법으로 재설정하시면 됩니다. 단차 높이 조절, 낮은 등급의 낮은 가치 차이, 높은 값과 낮은 값의 차이가 있는 경우, 재설정할 값의 높은 수준과 낮은 수준, 위와 같이.
아래에 설명된 기기 단계의 특정 조정.
예 1: 테스트 블록 HRC63의 공칭 값, 3 도 더 높은, 딸깍 하는 소리 “Settings” 단추, 디스플레이에 측정된 높이 값이 표시됩니다., 예를 들어, E7 5 2, 어디 75.2 고급 컴퓨터에서는 메모리 값을 조정해야 합니까?, 이제 그들은 참조 블록의 높은 값을 측정했습니다. 3 컴퓨터 내부의 학위는 부정적인 용어로 사용됩니다., 따라서 이는 추가적인 내용을 기반으로 해야 합니다. 75.2 3 도, 마이너스보다는 3 도, 테스트 블록의 공칭 값을 달성하기 위해, 숫자 키도 Enter를 눌러야 합니다 75.2 + 3 = 78.2 도, 그런 다음 “high profile” key, 화면이 표시됩니다 “000” 입력 값이 식별되었음을 설명합니다., 그런 다음 클릭하세요. “Measure” 정상 상태로 들어가는 키를 측정할 수 있습니다..
예 2: 블록 공칭 HRC32.5 측정 시, 실제 측정값은 HRC28.5에 표시됩니다., 낮은 4 학위 이상, 재설정의 필요성, 방법은: 먼저 설정 버튼을 클릭하세요, E □ □ □는 면적에 따른 높이 조정 값입니다., 이제 조정 값을 낮게 설정해야 합니다. (이제 측정되었으므로 낮은 블록이 낮습니다. 4 도), 그런 다음 “당연한 선택” 버튼을 누르면 P □ □ □ 설정 영역 조정 값이 낮습니다., 그러면 이 영역은 원래 값에서 마이너스를 뺀 값이 될 수 있습니다. 4 (원본이 그렇다면 40.0 도, 그런 다음 이 값은 숫자 키를 사용해야 합니다. 36.0 도). 권리, 해당하는 확인 버튼을 클릭하세요. “낮은 학교” 보여주다 “000”, 낮은 값이 입력되었다고 하더군요, 그런 다음 “당연한 선택” 각 데이터 세트를 보는 것이 정확합니다, 맞나요?를 누르세요 “측정 “일반 측정값을 입력하는 키.
일반적으로 공칭 테스트 블록 측정값보다 높습니다., 몇도 더 높은 값을 추가하려면 해당 설정을 여러 번 늘려야 합니다., 반대로 낮은 설정과 낮은 설정을 사용하면 10의 값 조정 사이의 차이를 여러 번 줄여야 합니다., 약간 조정하는 전위차계, 준수일까지.
근무할 때 “Measure” 방법, 누적 평균에서 이중 파일 키 파일 키, 브리넬, 비커스와 로크웰이 유효합니다..
장비가 측정 작업 중일 때, 측정된 압력 수두마다 1-2 초, 디스플레이에 측정 결과가 표시됩니다., 측정 머리 위로, 가치가 사라진다, 다음 측정을 기다리세요.
If you want to find the average value can be displayed in each measurement, the measuring head will not lift, click the total button, it shows the cumulative number of times n, each time, until the accumulated value plus 1 9; if averaged, then Impressions after the measuring head will not lift, each click the “평균” 단추, the display will flash the average number of times and average.
In the normal test mode, the instrument displays the value of Rockwell hardness, if you want to convert into its corresponding Brandt, the show -□ □ □ Brinell value, according to Victoria’s key, the display L □ □ □ Vickers value by Rockwell key, the display □ □. □ Rockwell value.
- 5Frequency Shift: 사용된 프로브의 작동 주파수 유지를 모니터링하는 데 사용되는 주요 기기, 일반 측정에는 이 키가 없습니다..
- 6악기 요금: 켜져 있을 때, 화면이 나오지 않아요 “:” 상징, 배터리가 완전히 충전되었습니다, 정상적인 측정일 수 있습니다.. 부팅 중이거나 작업 중인 경우, the display shows “:” 기기 배터리를 재충전해야 한다는 기호, 그런 다음 충전기를 연결해야합니다, 220V 전원 공급 장치에 연결, 충전 표시등, 회로는 일반적으로 배터리를 충전합니다. 8 충전 시간. 과충전하면 배터리 수명이 단축된다는 점에 유의하세요.
- 알아채다:
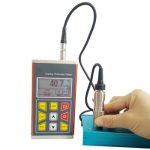
5.1 최초 사용 측정, 프로브를 손으로 직접 측정할 수 있습니다., 프레임 일치 측정도 측정할 수 있습니다.. 하지만, 주의를 기울여야 하는 방식에 관계없이, 프로브를 표면에 수직으로 만들기 위해, 느리게, and the surface contact pressure in the end, non-impact collision with the surface, otherwise it will affect the accuracy of the displayed value even probe damage.
When the small plane, 예를 들어, the hardness of the gear tooth surface measurement, measured off the front of the sleeve, the first direct contact with the measurement on the test site, the pressure in the diamond top surface of the workpiece can be measured, 이것 , the measurement accuracy depends on the stability of hand.
5.2 pairs of specimen surface roughness generally require 3.2 이상, the hardness can get more accurate values for the rough surface for the various parts to repair after a certain grinding. If the specimen surface is not uniform throughout the organization, you can take a set of data, on average, to obtain the surface hardness values.
5.3 When the sheet metal or hard parts of the implementation of the cavity material hardness measurement, it is important to make it thicker than the penetration depth of the pressure head, roughly the provisions of the thickness of the specimen to the depth of indenter penetration more than 10 타임스, 그건, the depth of indenter penetration is about 10-30um), readings will be accurate. 첫 번째, when measuring the back of the metal sheet coated with oil and other large metal surface quality of the coupling to get the correct readings.