
KH270B Intelligent Nondestructive Ultrasonic Hardness Tester
- Description
- Inquiry
Description
- KH270B Intelligent Nondestructive Ultrasonic Hardness Tester
- OVERVIEW
KH270B intelligent nondestructive ultrasonic hardness tester is a measuring rod by means of ultrasonic sensors to measure the hardness of a high-tech, intelligent new tool. As the instrument uses an advanced sensor systems and microcontroller technology, so the instrument in the function and structure is completely different from the traditional ultrasonic hardness tester, especially in the realization of cloth, Luo, multi-dimensional standard hardness conversion, multi-point equilibrium value The calculation shows that the exact precision, the use of simple procedures and many other aspects have been further refined and improved.
The instrument is mainly used in Rockwell hardness measurement can also be converted to the corresponding Brinell, Vickers hardness to display.
Features: No damage on the surface of the workpiece, high speed, simple operation and high precision. The finished piece, metal sheet, metal sheet (including the nitrided layer, carburized layer, plating layer, etc.), as well as easy movement of large parts and difficult to remove the special shape of parts and components, can be 100% directly hardness measurement.
KH270B Intelligent Nondestructive Ultrasonic Hardness Tester
- TECHNICAL DATA
| Indication range | HRC10-70, HB100-550, HV100-999 |
| Display accuracy | Rockwell hardness is displayed, display the range and precision of 0.1° |
| Indicating accuracy | ±1unit of Rockwell C hardness |
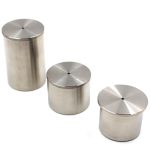
| Pressure head specification | 136°diamond pyramid |
| Contact pressure | Uniform contact pressure12N±1N |
| Power supply | AC220V±10%, DC5V |
| Overall dimensions | 200x100x35mm |
| Weight | 0.28kg |
- KH270B Intelligent Nondestructive Ultrasonic Hardness Tester
- THE BASIC PRINCIPLES
A uniform contact pressure, the sensor bar to the top of the pressure head and the specimen surface contact, the hardness of specimens of different rods produced by the resistance of the sensor is different from feedback received ultrasound signal change. Ultrasonic hardness testing method is through receiving different ultrasonic sensors to measure the frequency change the hardness of the specimen surface.
Of course, the elastic modulus of specimens of different, there will be some impact, if the same standard modulus test block can be adjusted to eliminate this effect. - KH270B Intelligent Nondestructive Ultrasonic Hardness Tester
- INSTRUMENT CALIBRATION AND USE
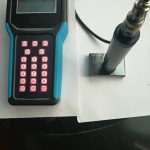
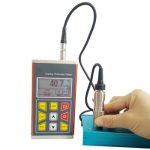
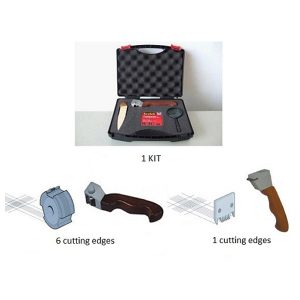
Instrument panel and function keys:A. ON
B. OFF
C. Measuring headsocket
D. Charging connector
E. The number key
F. Function key
G. Revised value of the key
H. Measuring key
I. Setting key
J. Undervoltage instructions
- 1Power Switch: Press the switch to “ON” power is on, the display shows “0”, the instrument into the normal measurement mode, press “OFF” switch the machine is turned off.
- 20-9 number key on the panel is in the “Setting”, enter the various values used.
- 3 All the function key on the panel for the dual-function key, when in the “settings” mode when working in the shift, which was selected, high-profile, low-key, high block, low block key to effective, which was selected (ie, display selection) of the total cycle through four elements, each time the “obvious choice” key to display the contents of a transformation. 1. E □ □ □ (where □ for the project’s value) for high-end correction value areas, referred to as a high profile.
- P □ □ □ correction value for the low-end area, referred to as a low profile, following the same. H □ □ □ a high degree of test block for the nominal value, L □ □ □ low test block for the nominal value. General factory, have set all the settings finished, without adjustment, when for some reason, need to re-set, you can follow these steps.
- 3. 1First, according to “adjust” button, the display shows “0” state of the school the whole measure, then measure the actual value of the high block (value may be slightly increased with time changes, taking some value to the former) measured in a single block to obtain a set of data points, and then take one value and recorded in case the “set” when a “high profile” value into the machine.
- 3. 2Blocks and then measuring the actual value of the low hardness, and high block as the value of measuring points and recorded one take to prepare for the “set” when a “low key” values are stored in the machine.
To obtain the “high profile” and “low key” and the nominal value of the hardness test block, a high degree of test block referred to as “high block”, low test block referred to as “low blocks”, that made settings need to enter a complete set of data, the “high profile”, “low key”, “high block”, “low blocks” of four values
- 3 . 3 Press the “Settings” button, the display shows E □ □ □, that is the setting state, E said that a high degree of value, this time to be made in the above “high profile” value through the numeric keys to enter can be (note The display shows four figures, the low 3 significant). Enter the value is correct, press the “high profile” button to confirm, the display shows “0000” indicates data has been identified and read into the machine, and then press the “obvious choice” key the display shows P □ □ □ into the “low” value set given state, then the value can be low-key with the numeric keys to enter (the same low three significant), is correct, press the “low profile” button on screen “000” to confirm and then press the “obvious choice” key, which was entered H □ □ □ state of high block value set, then still using the number keys on the high hardness of the block with the number keys to enter the nominal value can be (low three significant), is correct, press the “high block” button to confirm the obvious, “000” , then click “obvious choice” button, the display was L □ □ □ blocks of low hardness value is set to enter the state, then press the number keys are still the low hardness of the nominal value of the input block can be, correct and press the “low block “button was” 000 “, thus, all completed a set of data set (according to what was selected key to cycle through the data stored is correct).
- 3. 4Press the “Measure” key was “0” into the normal measurement state. In the measurement process if there are errors, then, generally less than 2 degrees, you do not have to adjust, if more than 2 degrees, you can reset by the above method. Height difference height adjustment, low-value difference of lower degree, if the difference between high and low values, the high and low degree of value to be reset, as above.
Specific adjustments on the instrument steps illustrated below.
Example 1: Nominal value of the test block HRC63, 3 degrees higher, click “Settings” button, the display shows the measured height values, for example, E7 5 2, where 75.2 is the high-end machines have to adjust the value of memory, and now they measured high value of reference block 3 degrees inside the computer used as a negative terms, so it must be based on an additional 75.2 3 degrees, rather than the minus 3 degrees, in order to achieve the nominal value of the test block, so should the number keys Enter 75.2 + 3 = 78.2 degrees, and then “high profile” key, the screen displays “000” describes the input values have been identified, and then click “Measure” key to enter the normal state can be measured.
Example 2: When measuring block nominal HRC32.5, while the actual measurement value is displayed in HRC28.5, low 4 degrees or greater, the need to re-set, the method is: First click on the Settings button, there E □ □ □ is the height adjustment values into area, and now need to set the adjustment value is low (as it is now measured the low block low 4 degrees), so to then click the “obvious choice” button to display the P □ □ □ set zone adjustment value is low, then this area can be the original value minus 4 (if the original is 40.0 degrees, then this value must use the numeric keys to 36.0 degrees). The right, click the OK button corresponding “low school” show “000”, said the low value has been entered, then you can press the “obvious choice” to look at each set of data is correct, is correct press the “measurement “key to enter the normal measurements.
Generally higher than the nominal test block measured value, the corresponding settings should be increased several times to set the value of adding a few degrees higher, on the contrary should be reduced if the low setting and low setting to reduce several times a few degree of difference between the value adjustment of ten ten, a potentiometer to adjust a bit, until the compliance date.
When working in “Measure” mode, double-file key file key under the cumulative average, Brinell, Vickers and Rockwell are valid.
When the instrument is in measurement work, the measured pressure head every 1-2 seconds, the display shows the measurement results, measurement head up, the value disappears, wait for the next measurement.
If you want to find the average value can be displayed in each measurement, the measuring head will not lift, click the total button, it shows the cumulative number of times n, each time, until the accumulated value plus 1 9; if averaged, then Impressions after the measuring head will not lift, each click the “average” button, the display will flash the average number of times and average.
In the normal test mode, the instrument displays the value of Rockwell hardness, if you want to convert into its corresponding Brandt, the show -□ □ □ Brinell value, according to Victoria’s key, the display L □ □ □ Vickers value by Rockwell key, the display □ □. □ Rockwell value.
- 5Frequency Shift: The main instrument used to monitor the maintenance of the operating frequency of the probe used, the normal measurements do not have this key.
- 6Instrument charge: When turned on, the screen does not appear “:” symbol, the battery is fully charged, can be a normal measurement. If the boot or in the work, the display shows “:” symbol that the instrument battery needs recharging, then the charger should be connected, and connected to 220V power supply, charging indicator light, the circuit will charge the battery generally around 8 hours to charge. Please note that over-charging will result in reduced battery life
- NOTICE:
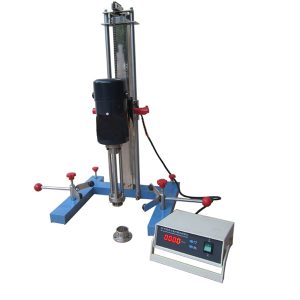
5.1 Measurement of the first in use, you can hand probe to measure directly, can also measure the frame matching measure. However, regardless of the way it should pay attention to, to make the probe perpendicular to the surface, slowly, and the surface contact pressure in the end, non-impact collision with the surface, otherwise it will affect the accuracy of the displayed value even probe damage.
When the small plane, for example, the hardness of the gear tooth surface measurement, measured off the front of the sleeve, the first direct contact with the measurement on the test site, the pressure in the diamond top surface of the workpiece can be measured, this , the measurement accuracy depends on the stability of hand.
5.2 pairs of specimen surface roughness generally require 3.2 or more, the hardness can get more accurate values for the rough surface for the various parts to repair after a certain grinding. If the specimen surface is not uniform throughout the organization, you can take a set of data, on average, to obtain the surface hardness values.
5.3 When the sheet metal or hard parts of the implementation of the cavity material hardness measurement, it is important to make it thicker than the penetration depth of the pressure head, roughly the provisions of the thickness of the specimen to the depth of indenter penetration more than 10 times, that is, the depth of indenter penetration is about 10-30um), readings will be accurate. First, when measuring the back of the metal sheet coated with oil and other large metal surface quality of the coupling to get the correct readings.


Tester-300x300.jpg)